Our new DIY raised planter box is perfect for our small balcony. It was easy to build and added much-needed greenery to the otherwise still empty space.

The balcony still needs a full makeover, including some new decking, which we plan to add later this year, but our new raised planter already looks fabulous. But it doesn’t just look great, this raised plant box has a secret – it’s self-watering!
There’s a clever hidden system in the planter that you can fill, and it keeps the plants watered for weeks on end. Perfect for anyone who, like me, forgets to take care of her plants.

We’ve had this planter for just under a year, and all we’ve done is fill it with water once. We purposely chose low-maintenance plants, so we haven’t even had to take care of them. This is a great project if you want pretty plants but don’t have the time to care for them.
What you will need to build a raised planter box that’s self-watering:
This post contains affiliate links. We only recommend products we love and think that you will, too! Read our full disclaimer here.

Supplies:
- Timber
54mm x 34mm timber battens for the frame
75mm x 47mm timber supports for the base
22mm x 100mm slats for the base
24mm x 48mm timber slats for the slatted cladding
19 m x 60mm timber slats for the top edge - Wheels (make sure they’re suitable for outdoors and a heavy weight)
- Wood Glue
- Screws
- Wood filler
- Primer & Paint
- Pond liner
- Weed membrane
- Flexible drainage tube
- Duct tape
Tools:
- Mitre saw
- Cordless drill and drill bits (we also used our impact driver, which we love, but you can just use a cordless drill)
- Kreg Jig
- Nailer & Nails
- Paintbrush
- Staple gun & staples
- Stanley knife
How to build a raised planter box:
Building a self-watering raised planter box is a very beginner-friendly project. And, we’re sharing the exact steps and all the information you need to build this planter.
Step 1
Cut The Timber
Start by cutting all of the timber to the sizes you need to build the DIY raised planter box.

For the frame you’ll need:
- 4 x 54mm x 34mm x 730mm Legs
- 4 x 54mm x 34mm x 1400mm Long horizontal frame pieces
- 4 x 54mm x 34mm x 330mm Short horizontal frame pieces
- 2 x 54mm x 34mm x 530mm Central vertical frame support pieces
For the base of the planter, you’ll need:
- 2 x 47mm x 75mm x 1500mm Horizontal base supports
- 13 x 22mm x 100mm x 330mm Slats for the base (you don’t have to be too exact with this)
For the cladding you’ll need:
- 26 x 24mm x 48mm x 1550mm slats for the long side
- 26 x 24mm x 48mm x 446 mm slats for the short side
For the top edge, you’ll need:
- 2 x 14mm x 70mm x 1550mm slats
- 2 x 14mm x 70mm x 446mm slats
Measure and mark where you have to cut, then chop the timber into pieces with your mitre saw.
All of the frame and base pieces are straight cuts. For the cladding, we cut each end at a 45° angle so that the pieces join up nicely around the raised planter, giving it a more professional finish. Obviously, you could just cut them straight, too – double-check the measurements beforehand, though!
As there’s quite a lot of cutting to do to build this box, we highly recommend using a mitre saw instead of attempting to cut the pieces by hand. A mitre saw is such an easy-to-use and versatile tool that you’ll probably find that you use it for more projects than you imagined.
We built some of our favourite projects with the help of our mitre saw, including our outdoor cabana-style daybed, modern slatted radiator cover, and budget-friendly dining bench.
When you’ve finished cutting all of the pieces, sand them with 120-grit sandpaper to remove rough edges and ensure they are smooth.
Step 2
Build The Frame
Start by drilling the holes for the pocket screws.
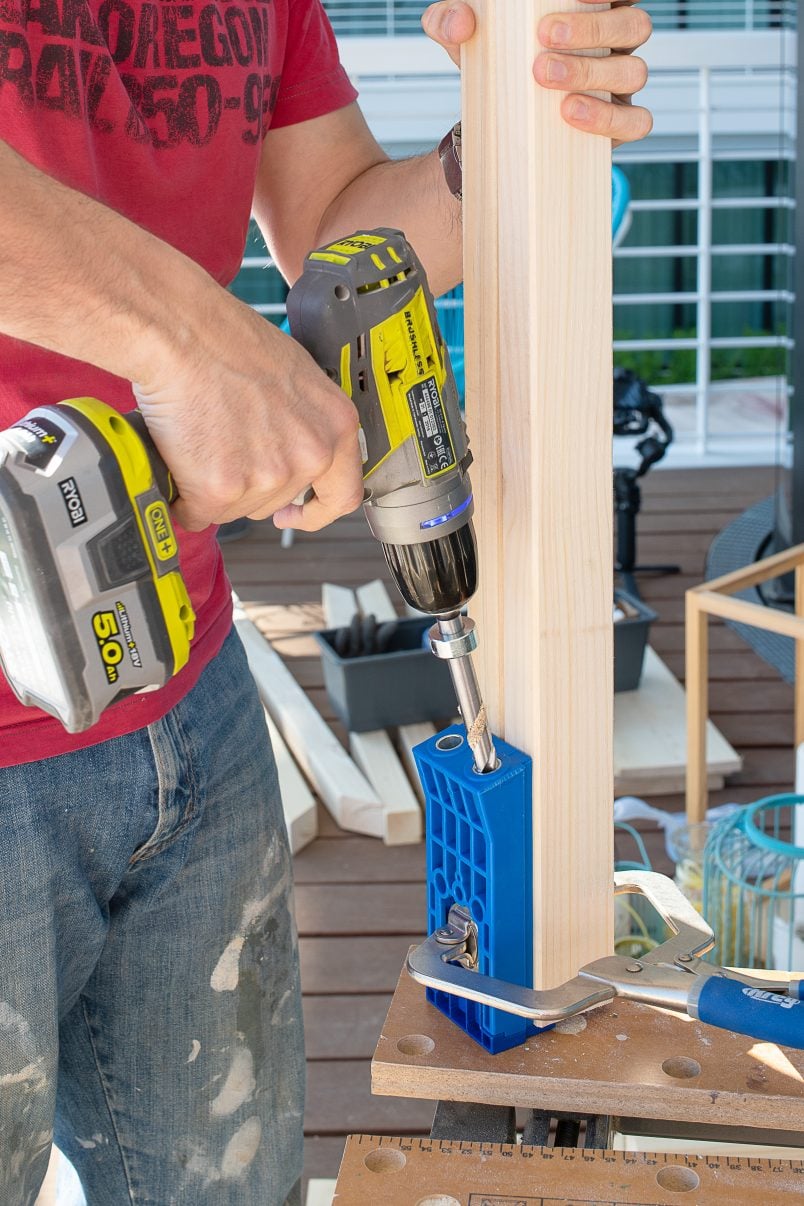
We used our Kreg Jig to prepare all of the holes, which meant that it was just a matter of clamping the jig to the wood and drilling through the hole with the included drill bit. It’s an amazing tool, and it’s already helped us build lots of furniture, including our IKEA pax hack, which allowed us to extend the cupboard right up to the ceiling.
A Kreg jig is super helpful, but you could build this project without one, as none of the frames will be visible, and you could just screw the pieces together directly. It is a great tool to have in your collection, though.

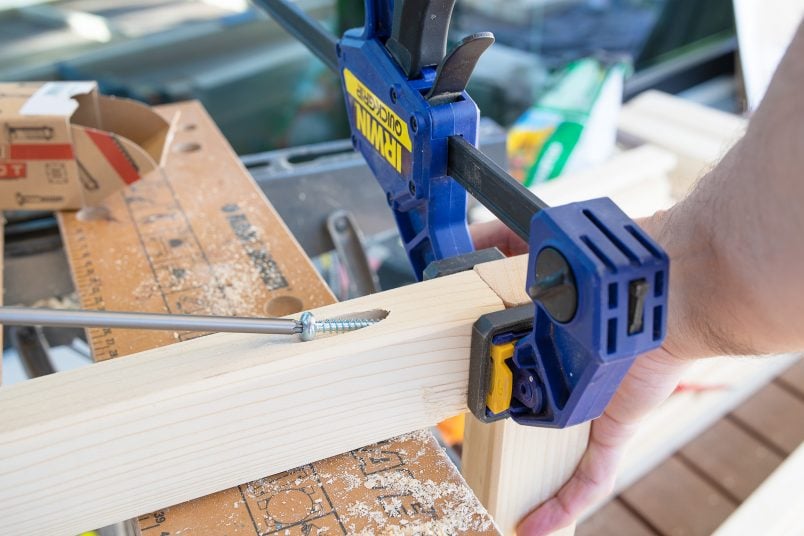
Once you’ve prepared all of the holes, apply some wood glue where the pieces of timber meet, clamp them together and then use the pocket holes you prepared to screw everything together.
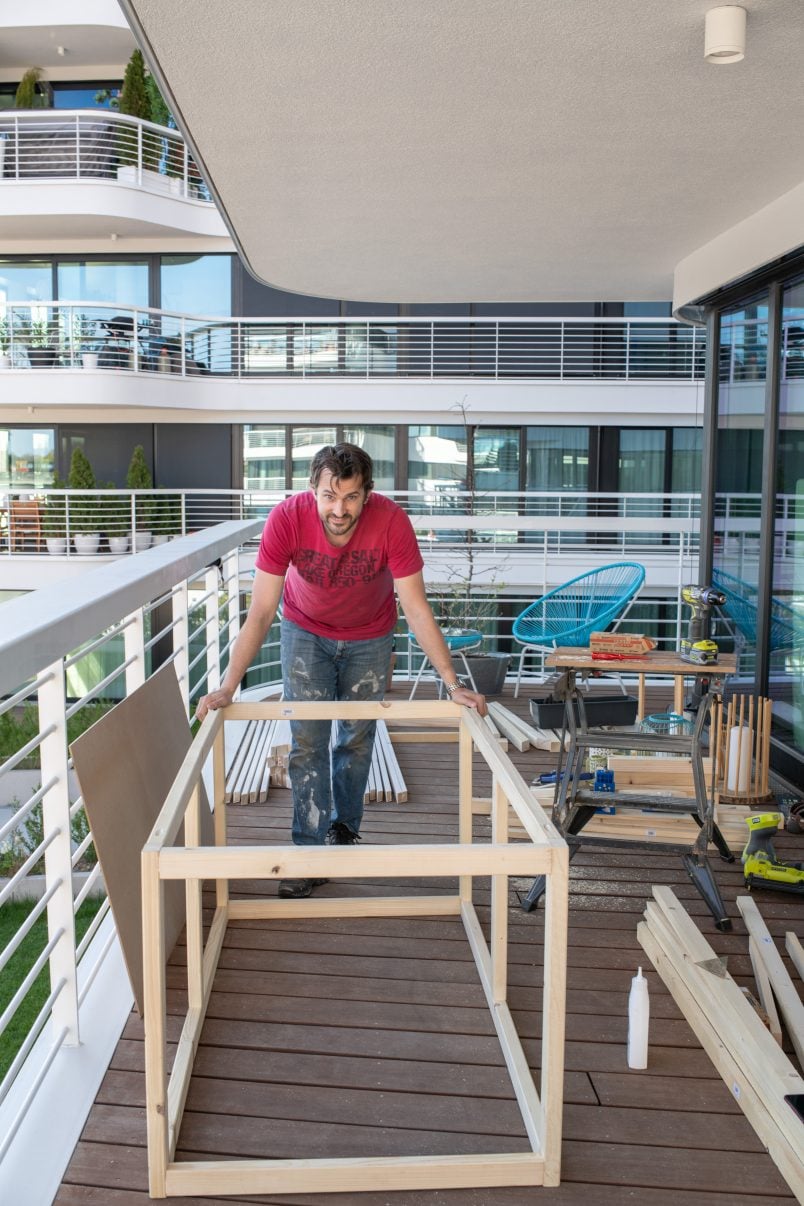
A Quick Note:
As you can see, the frame we built looks larger than the finished result. That’s because it is. We reused the timber from the DIY outdoor storage box we built a couple of years ago.
We no longer needed the storage box, so we decided to tear it apart and reuse the timer to build our new DIY raised plant box. The only difference between this box and the one for the planter is the length of the horizontal supports (which we shortened). Oh, and I also decided to paint it black but then decided I preferred a light colour, so I painted it back again. Whoops!
Step 3
Add The Base
Once you’ve built the frame, you can add the base.
Screw the long horizontal base supports to each inner side of the planter with a couple of long screws before adding the slats for the top.

We tried to make this DIY planter as budget-friendly as possible, so we used some wood from an old palette we had lying around. It doesn’t matter too much what timber you use here as it will be completely hidden (although you should always use timber that’s been treated for outdoor projects.
Just cut the slats to the width of the planter and nail them to the horizontal frame. It doesn’t matter if there are small gaps between them.

To ensure that the finished DIY raised planter isn’t too heavy, we raised the base off the ground by about 20cm. Obviously, this is completely optional. If you do this, make sure that you still have enough depth for the soil and drainage.
Step 4
Add The Pond Liner
Now that the frame is complete, it’s time to add the pond liner.
Place it into the planter and fold the corners to fit in the frame. Then, staple it to the top edge of the planter before cutting off any excess.

Be careful not to damage or cut into the pond liner. It has to be one continuous piece that you fold into the corners so that no water will leak.
Step 5
Add The Wheels
Filled garden planters are always heavy, so we added a couple of wheels to make it a bit more manoeuvrable on our small balcony.

Screw the wheels – we used 6 in total – to the bottom of the planter before flipping the whole thing the right way up. You can skip this step if you don’t want or need to move the planter.
Step 6
Paint Everything
Painting the wood was the most time-consuming part of this project as there were 54 slats and the frame of the box to paint. You could paint the planter after assembling it, but it’s easier to paint the slats before as it’s easier to reach all spots, and you don’t have to wiggle the paintbrush into the narrow gaps.
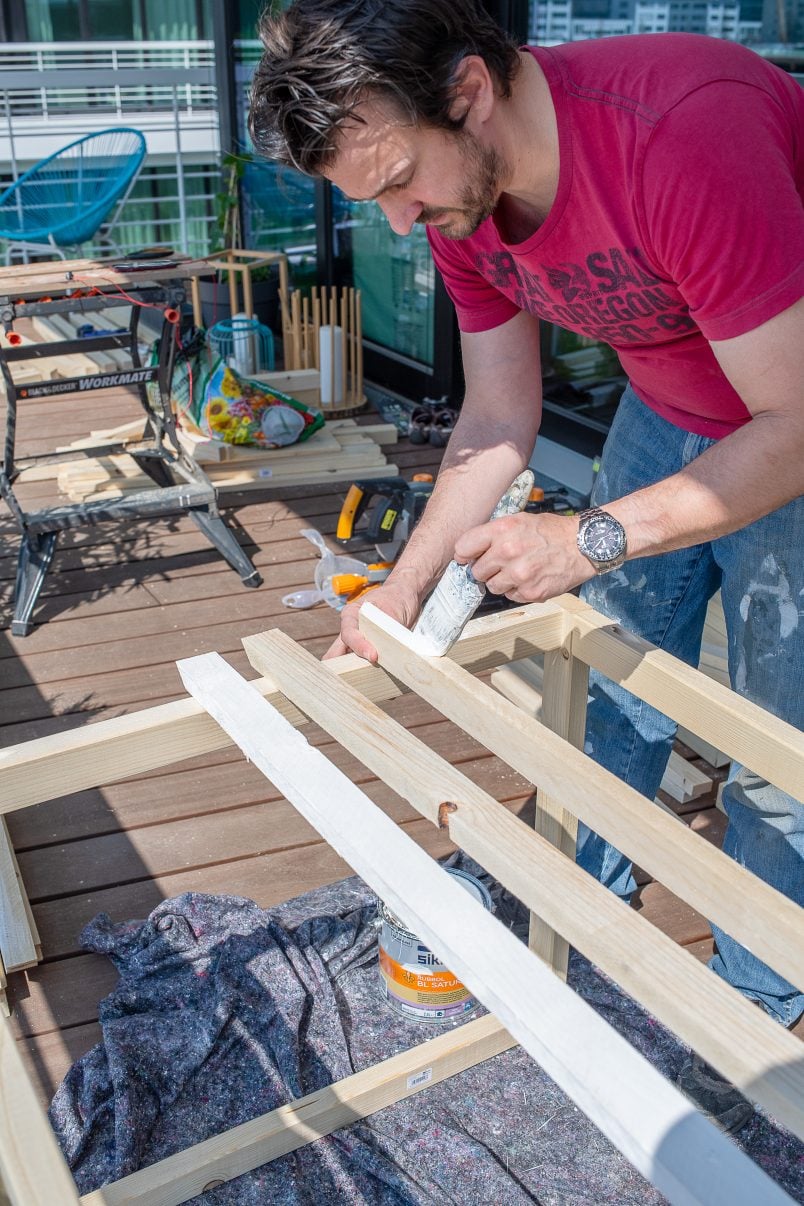
It’s fair to say that this process is also much quicker if you don’t decide to paint everything black, change your mind and then paint everything an off-white colour again.
Just make sure to use good-quality outdoor paint so that the finish lasts. We’re using an oil-based paint that we’ll be using for all exterior woodwork, but a high-quality water-based paint will be fine, too.
Step 7
Attach The Slats
This is where the planter finally starts to take shape.
Start at the top of the planter and work your way down. The first row of slats should start 5mm below the top edge.

Make sure to get the first row perfectly straight, and then nail the other rows in place with your nailer. We used a little piece of wood to leave a 5mm gap between each row.

Step 8
Add The Self-Watering Components
We loved the idea of making our planter self-watering and followed the instructions in this fabulous guide, which we recommend checking out.

Basically, you pop some drainage tubes in the bottom of the planter and cover the ends with a weed membrane. Then, insert a small tube as an overflow and a larger pipe that you use to fill the drainage tubes.

The whole pipe construction is then covered with a mix of vermiculite and peat moss (get peat-free moss if you can), followed by a layer of potting soil.

It’s really straightforward. For more details on exactly how to do this, check out the full guide here.
Step 9
Attach The Top Edge
The last step is to add the top edge of the planter, which will hide the pond liner and give everything a clean finish.

Cut the ends of the timber slats at a 45° angle and nail or screw them to the top of the planter.

Step 10
Add Filler & Paint
Fill any gaps and nail holes with wood filler. When it’s dry, sand everything smooth and touch up any paint where necessary.

Step 11
Fill With Soil & Plants
When your DIY raised planter box is complete, you can start to fill it with your chosen plants. We chose a mixture of lavender (which is apparently a good plant for keeping mosquitos at bay) and Californian Lilac, which we had in our last house and loved. When it flowers, it’s covered in hundreds of beautiful little blue blossoms. Oh, and it needs almost no care, so that’s a bonus, too!
Hopefully, when the plants have grown a bit, they add a bit of privacy to our balcony which is a lovely spot to relax in the evenings – or at least it will be when we’ve replaced the tiles and have somewhere to sit!

How much does it cost to build a raised planter?
Large planters can be surprisingly expensive, which is why we decided to build this raised planter. It’s the perfect size for our balcony and, for such a large planter, was affordable, too.
Here’s the full DIY raised planter cost breakdown:
- Timber Frame & Slats | 64€
- Wheels | 12€
- Paint | 12€
- Wood Filler, Nails, Staples, Tape & Sandpaper | 10€
- Pond Liner | 15€
- Weed Membrane | 2€
- Drainage | 30€
- Vermiculite | 20€
- Soil & Plants | 30€
Total Cost: approximately 165€ (195€ with the soil and plants)
(this doesn’t include the cost of the tools we used and things like electricity)

How often do you have to water a self-watering planter?
We actually only watered it once! We finished it in August last year, filled it, and never watered it again. However, how much you have to water will depend on the weather. I’m pretty sure it’s not stopped raining here for the last 12 months! Hopefully, we have a lovely summer, so I can test how often it needs water.

Will the DIY Raised Planter Box Last?
Yes! We built this raised planter last year and it’s been outside and uncovered ever since. It looks exactly the same as the first day we built it. It even survived our scaffolders, who decided they were too lazy to move it and ripped out my plants to place the scaffolding in the planter.

One of the best things about this planter is that it’s not as heavy as it looks. Because of the hidden raised platform, there isn’t as much soil as you’d expect, making it manoeuvrable. It is still heavy, so you’ll need to add wheels if you plan on moving it.


Leave a Reply